You Just Created a New Google Classroom. What’s Your First Move?

You’re at the beginning of the year, the semester, the term, or a fresh unit of study. Fun!

Your brand new Google Classroom is sitting there, sparkling, completely untouched. You want to set it up a little before having your students join.

What should you do first?

In this video, I’ll show you the important move that I make in my middle school context that optimizes my practice, preserves my sanity, and supports my learners.

If you’ve got a better first move, I’d love to hear it.

Get the Most Out of Google Classroom: 13 Moves to Make

Here are the strategies I recommend to help you optimize your practice, preserve your sanity, and support your learners.

Welcome to Google Classroom. Whether you’re brand new to the platform or you’ve been here for a while, I’ve learned a few things that I think you’ll find helpful.

Let’s get into them.

1. Disable student posts, but allow comments.

You’ve just created a new Google Classroom. Easy.

From here, your first move is to disable student posts. You’ll be able to make this move in Settings.

No alt text provided for this image

I teach in a middle school, and I’ll give you this word of warning: your Classroom feed can get away from you quickly if and when your middle or high school students discover the power to create their own posts.

Not today, students. Limit them to commenting.

Student comments can form an important part of a healthy learning community as they ask thoughtful questions, make suggestions, or encourage each other. And comments can be easily managed: it’s easy to mute a student who gets a little spammy or carried away.

But disable student posts.

2. Show attachments and details on the Stream.

I see ten different classes per week. That’s ten unique Google Classrooms.

I find it incredibly helpful to be able to quickly log into a Classroom and see at a glance what I last posted, when I posted it, the attachments and exemplars I provided for students, and how many students have submitted their work.

No alt text provided for this image

When posts aren’t expanded on the Stream, it takes more brainpower and time to try to recall the nature of a learning activity by its title alone, and I have no idea what student progress is like without clicking into it. Ugh.

I know there are some who prefer no learning activities on the Stream page at all, but to me that just doesn’t make sense.

The Class Work page is not listed chronologically, which means that it does NOT tell me at a glance which learning activity I posted last. And just like the Stream when it’s set to condensed notifications, the Class Work page does not show details of learning activities or student progress without clicking into it. Ugh.

That’s too inefficient for my liking.

No alt text provided for this image

Take my advice and make this move in your Classroom settings.

3. Limit notifications strategically.

Limit your Google Classroom email notifications before they limit you.

Seriously, if you leave this wide open and you teach a number of classes, your sanity will disappear quickly under an avalanche of emails.

To adjust your Classroom notifications, go to your General Classroom Settings. You’ll find the icon in the very top left of your screen from anywhere in Classroom.

No alt text provided for this image

Next, scroll down to the very bottom of the menu to find Settings. From there, you’ll see the controls for Email Notifications.

The first button is the master switch. You do have the option to turn ALL notifications off. But I don’t recommend it.

No alt text provided for this image

There are many kinds of notifications that are useful and will contribute to the learning life of your Classroom. For example, if a student posts a question, you want to be notified of it with a direct link to the learning activity in question — very helpful.

Instead, you want to think strategically about eliminating notifications that don’t help you serve students.

For example, I start by turning off notifications for student work that has been submitted late. If a learning activity was due on Monday, I’m not concerned if they submit it on Tuesday. Frankly, I’m happy they submitted it at all.

Late > never. If it’s been submitted by the time I review it and provide feedback, we’re good.

No alt text provided for this image

There, I just reduced the emails hitting my inbox.

Next, I turn off notifications in any Classrooms where I am not actively teaching (but I am still a Teacher in the Classroom). Let me explain.

I teach 8B Math, and I have an 8B Classroom. I do not teach 8C or 8P Math, but I like to be a Teacher in those Classrooms so that I can pop in and see what my partner teacher is doing at any time.

No alt text provided for this image

Turning off notifications for Classrooms where I want access but don’t actively teach is another way to reduce emailed notifications.

4. Invite students to create a Google Classroom header using Canva for Education.

We know that giving students voice and choice wherever we can in the learning community increases their sense of agency, ownership, identity, and belonging.

So why not give them a chance to put their fingerprints on your Google Classroom?

No alt text provided for this image

This year, I started off the term by inviting my new students to do exactly that. Using their free Canva for Education accounts, students created their own Google Classroom header from a sea of templates.

No alt text provided for this image

They submitted their entries, and then I get the fun of featuring a different student’s creative personality every week (or two). It keeps things interesting, it saves me the time of making creative headers myself, and students feel a little more connected and recognized. It’s win-win.

No alt text provided for this image

You’ll get a mix that represents our students: balanced, creative, classy, serious — and the laughably bizarre. All are welcome.

5. Put emojis at the beginning of each topic and post title.

By putting emojis at the beginning of each Topic (section on the Class Work page) and post title, you’ll make your learning activities easily identifiable and build a clear sense of cohesiveness from activity to activity.

No alt text provided for this image

Another important benefit of this practice is that when it comes to reposting learning activities from previous years, activities can be difficult to identify or locate in the Reuse Post menu (since the Reuse Post menu doesn’t reveal Topics).

No alt text provided for this image

By including emojis at the beginning of each post title, I give myself a quick way of visually distinguishing between a unit on Surface Area (📦) versus the Pythagorean Theorem (📐).

6. Number your learning activities.

There is more power and convenience here than meets the eye. It is so helpful to be able to use numbers to give clarity to students regarding posted learning activities.

No alt text provided for this image

“Please submit your PNG file in Activity 2, not Activity 1,” you’ll hear yourself saying. Numbers make it easier to refer to specific assignments, especially as the unit moves along.

7. Treat posts as lesson plans: include as many of the main elements of the learning activity as possible.

Think of Google Classroom learning activities like lesson plans. Make them clear and dummy-proof, with numbered instructions, clear formatting, and all related attachments.

No alt text provided for this image

When your posts are this detailed, you hardly need lesson plans. Even better, your posts become easy for colleagues, substitute teachers, or your future self to repost.

Even if you improve on your lesson next year, you’re giving yourself a strong starting point. Your future self will thank you.

8. Use the Reuse Post option whenever possible.

I (almost) always prefer to Reuse Post rather than create a post from scratch. 

No alt text provided for this image

Reusing a previous post gives me lots of practical benefits:

  1. Emojis remain intact in the post title (I don’t have to look for them).
  2. The learning target and essential question are already present. Even if we’re moving on to a new learning target, it’s helpful to see our last one as I plan forward.
  3. Relevant attachments remain pre-loaded. Attachments might include a helpful PDF, a screenshot of randomized class groupings for our current project, a video resource that was helpful, or a Doc from a related class discussion.

9. Use the Question feature for frequent self-assessment by students.

How are my students doing with our latest learning target? How do they think their learning is going?

No alt text provided for this image

Use Google Classroom’s Question feature to quickly collect self-assessment data from your learners. Once you’ve created one such question, you can use the Reuse Post feature to ask similar questions in the future while keeping your multiple choice options (proficiency levels) intact.

No alt text provided for this image

In the Question settings, un-check ‘Students can see class summary’ to make sure results remain private. In my teacher view, I can click on any of the bars above to see exactly which students responded at each proficiency level.

Who are the two students who feel that their learning is still Developing and may require additional support? I can see in a click.

10. Use the app’s student selector to get to know your students.

I have the blessing of teaching 220 middle school students over the course of the school year. It’s an awesome opportunity for me to develop relationships with every learner in our community — a very helpful benefit when I throw on the hat of part-time vice-principal.

But how can I possibly learn and retain so many names? My most reliable hack so far has been the Google Classroom Student Selector (only available on the mobile app).

No alt text provided for this image

Here’s how it works.

At the start of class, I log into the appropriate Classroom on my Google Classroom mobile app. I post one of these great check-in questions on the screen (hopefully with an answer frame as a Tier 1 support).

Then I put the Google Classroom student selector. It does its job of randomizing the student order, but the win for me is that I get to say each student name a couple of times and pair the name immediately with the face.

“Next up, we have Dan! How would you respond to this, Dan?”

Dan may give me a colorful response, which may give me something to associate with his name and face. In any case, I’m getting to know my students better.

11. Use ‘Each Student Will Get a Copy’ to track student progress in real time.

Your students’ work may be incomplete or unsubmitted, but it’s NEVER going to be missing when you select ‘Each Student Will Get a Copy’ beside a Google Doc, Slide, Sheet, Jamboard, or Drawing.

No alt text provided for this image

Never. Missing. You can look at it any time you want.

Let that sink in.

By activating this option, you can go into your students’ Doc, Slide, Sheet, Jamboard, or Drawing and see exactly what their status looks like in real time. There’s no more mystery around their progress or where their work is — you can see it right there.

This also gives you the opportunity to offer real-time feedback, coaching, and suggestions on their work.

That is BIG.

Once you’re viewing a student’s work, it’s easy to navigate quickly to other students. Use the drop-down menu or the arrow controls.

No alt text provided for this image

(I’m using my Teachers on Fire Google Classroom and a mock assignment to illustrate this point in order to protect the privacy of my actual students.)

12. If you’re in a standards-based grading environment, turn off rubric scoring.

For educators fighting the good fight against points and trying hard to put the focus of learning on proficiency, numbers in rubrics don’t help. To get rid of them, turn scoring off. Force students to think in terms of proficiency and consider the criteria you’ve provided at each proficiency level.

No alt text provided for this image

13. Add your colleagues to your Classroom as Teachers.

Your school is a learning village, and you can treat it like one by inviting your teaching teammates (who share the same subject as you) to your Classroom as Teachers. As described earlier, even if they’re not posting or actively engaging, it just makes sense to increase visibility and collaboration by sharing access.

The same goes for your educational assistants and para-professionals. Help them support your IEP learners the best they can by giving them full access and visibility at your Classroom. They’ll be able to view activity details, support their designated learners, and possibly even support other learners in the class.

And don’t worry — these other Teachers can’t do too much damage. Only you can delete the Classroom as original creator.

Closing thoughts

I’ve been on Google Classroom since about 2016. I’ve seen it slowly evolve forward, and I know it will continue to do so in the years to come.

Classroom isn’t amazing. It’s not especially powerful —when you think about it, it’s basically just a shell over Google Drive.

Google Classroom’s strength is its simplicity. It just works for teachers and learners.

Follow these simple tips, and I know you’ll enjoy the experience.

Happy learning, fellow educator.

ReClipped Chrome Extension and Chromebook Screen Recording

Are you a Google educator? Do you learn and teach with Chromebooks or in a Google-based school?

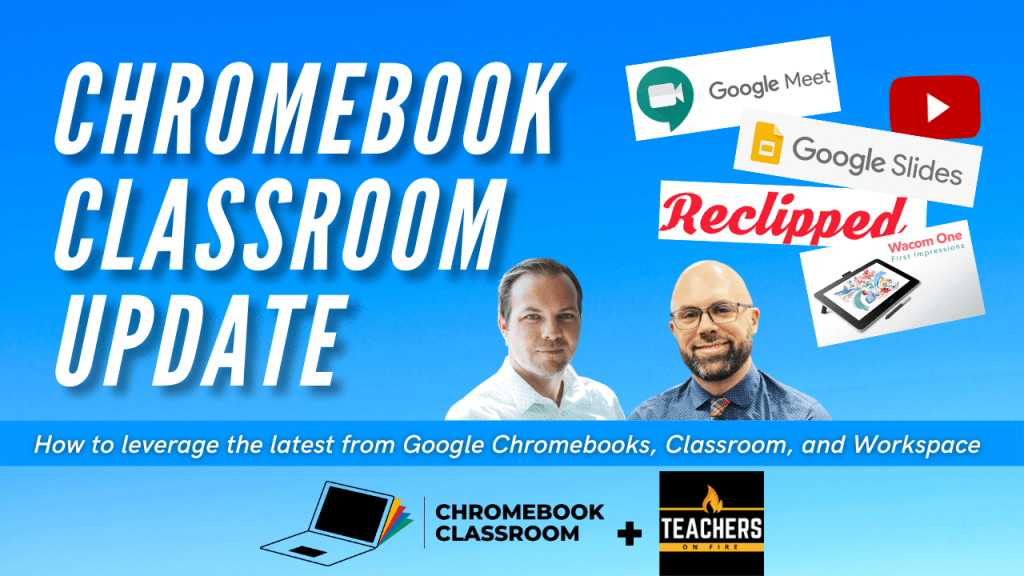
Join host Tim Cavey and John Sowash from the Chromebook Classroom for the first edition of the Chromebook Classroom update, a monthly episode that explores the latest developments in the world of Google Chromebooks, Classroom, Chrome extensions, and cloud-based apps for learning.

In This Episode

  • 4:09​ – Google Meet is introducing the ability to add custom backgrounds.
  • 6:53​ – Native screen and video capturing is coming to Chromebooks soon!
  • 13:36​ – How to integrate YouTube clips with learning activities in Google Slides.
  • 16:01​ – How to use format options in Google Slides to define the start and end points for YouTube clips.
  • 20:19​ – How to use the ReClipped Chrome Extension to add notes and timestamps to YouTube clips that you don’t own.
  • 28:09​ – One by Wacom is the first Chromebook-compatible drawing tablet

Learn More from John Sowash

Catch the Next Teachers on Fire Roundtable LIVE on Saturdays

As of this post, I’m still appearing weekly on YouTubeFacebookTwitterLinkedIn, and Twitch at 8:00 a.m. Pacific Time/11:00 a.m. Eastern Time each Saturday morning. I’d love to see you join us and would be happy to feature your questions and comments on the show!

Connect with the Teachers on Fire Podcast on Social Media

Subscribe to the Teachers on Fire Podcast on Your Mobile Device

Roundtable: Seesaw + Google Classroom Integration

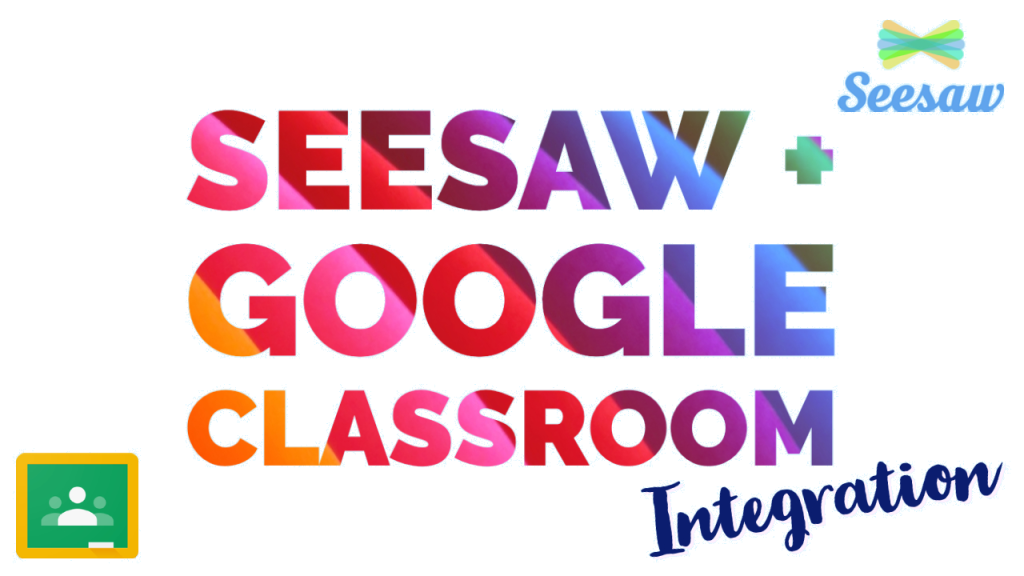
On Saturday, October 31, 2020, I joined Alicia and Matt Rhoads, Alfonso Mendoza, and Taylor Armstrong to discuss best practices, tips, and strategies for effective Seesaw and Google Classroom integration. Here is our conversation.

Questions That Guided Our Discussion

  • 1:24 – Who are you and what is your context in education right now?
  • 4:19 – What is there to like about Google Classroom as a learning management system?
  • 8:45 – How can students split their Chromebook screen to see Classroom and Seesaw side by side?
  • 11:46 – What is there to like about Seesaw as a learning management system?
  • 19:06 – How can we use Seesaw in 4th and 5th grade classrooms? (Alicia shares her screen.)
  • 28:07 – Matt and Alicia, how did you each convince your partners of the value of the other platform? (Matt shares how he came to use Seesaw at the secondary level while Alicia share how she came to use Google Classroom at the 4th and 5th grade levels.)
  • 30:53 – What other strategies or hacks would you share with teachers looking to integrate these two platforms strategically? (Alfonso says “Get clicky with it.”)
  • 38:15 – Why and how can Seesaw be used effectively at the secondary level?
  • 41:11 – How can intermediate and middle school teachers make the best use of Seesaw?
  • 44:33 – How can we use Seesaw analytics to make sure every student is socially and emotionally supported?
  • 46:55 – How many Seesaw activities should be pushed out to the Seesaw blog?
  • 48:29 – How can viewers connect with you and continue to partner with you in their learning?

With Thanks to the Guests Featured in This Roundtable

Catch the Next Teachers on Fire Roundtable LIVE

As of this post, I’m still appearing weekly on YouTubeFacebook, and Twitter at 8:00 a.m. Pacific Time/11:00 a.m. Eastern Time. I’d love to see you join us and would be happy to feature your questions and comments on the show!

Connect with the Teachers on Fire Podcast on Social Media

Subscribe to the Teachers on Fire Podcast on Your Mobile Device

We Already Have Google Classroom. Why Do We Need Seesaw?

These two learning management systems are a match made in LMS heaven.

Image for post
Photo by airfocus

My history with Google Classroom

I’ve been using Google Classroom since 2016. I’ve taught in a total of three Google-hosted schools in the years since I first started using it, so I’ve had plenty of time to build competence and confidence with this learning management system.

For the uninitiated, Google Classroom is a platform that utilizes the storage and sharing powers of Google Drive. It’s not especially powerful and doesn’t offer the nicest user experience. But it’s clean, efficient, and does most of what teachers, students, and parents need it to do.

I remain a big fan of Google Classroom and respect the ways this (still free) platform has iterated over time to improve its management of teacher instruction and student learning.

My history with Seesaw

This is now my third year using Seesaw as an eighth grade teacher. When I was first introduced to this learning management system in 2018, I was skeptical.

What was the point of Seesaw when we already used Classroom? Wasn’t it a little redundant? Wouldn’t parents be annoyed by yet another point of contact?

It didn’t take me too long to become a Seesaw believer, however. It was slow at first, but over time — with more risk-taking and experimentation — things started to click. I began to recognize what sets Seesaw apart, and how it could play a powerful role in the learning process for my students.

Experiencing both platforms from the parent perspective

With my own middle schooler also plugged into both platforms, I was able to experience Google Classroom and Seesaw from the parent side as well. It was a great experience.

From Google Classroom, I received daily automated emails informing me of class announcements, learning activities that were due soon for submission, and any assignments that were missing or overdue.

From Seesaw, I received notifications that let me know when my son (or his teacher) had posted photos, videos, or other products of student learning. I was able to view, like, and comment on his work in real time.

From Google Classroom, I received raw information and dates about my son’s learning. From Seesaw, I could see it and hear it in practice.

It was a great tandem.

Why should teachers, schools, and districts use Google Classroom?

Image for post

Let’s start at the beginning of the learning management conversation. Why should schools use Google Classroom at all?

In my view, there are lots of reasons. Here are some of them:

  • It’s free.
  • It’s completely cloud-based, allowing students to use Chromebooks as their primary device for learning (significant cost savings for schools and districts).
  • Smooth integration with Google Drive allows teachers to create learning activities in the G Suite and share them with ease.
  • Google Drive education accounts offer unlimited storage. Also for free.
  • The Google Classroom to-do list allows students to track all of their outstanding work in one place.
  • The ‘Make a Copy for Every Student’ option allows teachers to drop into student work (on Docs, Slides, Sheets, Drawings, Jamboard, etc.) and offer feedback in real time. Amazing!
  • It also tracks assignment submissions in real time, so teachers can see at a glance how many assignments are outstanding and who the holdouts are.
  • Its integration with Google Meet allows a convenient and secure way to meet virtually with remote learners. Google admins can disable student creation of Google Meets, making the link in Classroom 100% secure.
  • It allows teachers to design numberless rubrics based entirely on curricular competencies and proficiencies.
  • Integration with Google Forms allows teachers to post formative assessments that score themselves (if you’re into that) and give students instant feedback.
  • Private comments on every posted assignment allow for efficient teacher-student communication, feedback, and support.
  • Tight integration with Google Calendar means that Classroom due dates appear automatically in teacher and student calendars.
  • Countless third party apps and platforms allow quick importing of class lists or quick exporting of learning activities (from the app to Google Classroom). EdPuzzle and Khan Academy are two well-known examples.
  • The ‘Guardian Updates’ feature automatically does the important work that teachers have done manually for decades: they let parents know which learning activities are due soon for submission, and which learning products are missing or overdue.
  • It allows for quick and convenient email communication with selected guardians.

Okay, so you’re sold on Google Classroom. If you’re reading this post at all, perhaps you already were. Let’s move to the question that brought you to this post in the first place.

Why should teachers, schools, and districts use Seesaw?

Image for post

If Google Classroom already does so much, why should we use Seesaw as well?

Here are some of the reasons why schools and districts should also use Seesaw (and to be clear — this is NOT a paid promotion).

  • It’s more mobile-friendly than Google Classroom. There’s a designated app for parents that optimizes beautifully on mobile devices.
  • It’s powerful but simple enough to allow students of all ages to construct, share, and reflect on their learning.
  • It makes the learning journey more visible for all parties: for students, parents, and teachers. Google Classroom never shows learning activities to parents, and it can’t track work effectively over more than one school year.
  • It’s built for engagement, interaction, authentic audiences, and shared ownership. By allowing parents to view images, videos, and content, and then like and comment on those artifacts from their child’s learning, we’re letting them into the process. We’re also letting students know that their learning matters and that it happens in community. It expands the audience from the narrow vertical experience of teacher-student and student-teacher.
  • It allows in-app screencasting, allowing students to discuss their learning while typing, writing, or manipulating a stylus (without leaving the app). Thanks to Seesaw, I can watch and listen to every one of my 25 eighth grade Math students narrate their process as they provide solutions to given problems. That’s the kind of magic that is difficult to pull off on Google Classroom without a lot more clicks and the use of third party applications.
  • It allows teachers to easily add audio instructions and feedback.
  • It redefines teaching and learning for all stakeholders. Seesaw helped me evolve in my thinking about the nature of the learning process itself. Sure, I was already using learning targets to plan my lessons before Seesaw, but my teaching practice on this platform has only clarified my vision around purpose. Every time I share a photo or video of student work or students in action, the rationale should be more than just assembling a scrapbook of moments. These artifacts should show learning in motion toward clearly defined goals. And that’s a critical paradigm.
  • Seesaw allows us to build a more complete picture of a student’s learning. A child’s Seesaw journal is a record of all of their learning artifacts and reflections, viewable in a single stream or filtered by skill or subject folder. These pieces of learning don’t need to represent perfection — instead, they should show learning happening over time.
  • Seesaw allows schools to build longitudinal records of student learning over multiple years. Although I’ve never seen this in person, schools should be able to track a single student’s learning over 13 years in a single place. To track a student’s journey of growth for even a portion of that time — say, a student’s middle school learning journey — would be incredibly powerful.
  • Seesaw makes student-led conferences more impactful and interesting. It promotes agency, ownership, and student voice by allowing students to walk parents and teachers through their learning journey in a user-friendly format — basically impossible to pull off in Google Classroom.

A shorthand way to think of the two platforms

In short, Google Classroom remains the place where students DO most of their learning. Seesaw should be the place where they SHOW it.

That isn’t a perfect way to understand the partnership between the two platforms, but I think it’s a good summary.

Won’t students and parents be overwhelmed by two learning management systems?

That’s a fair question, but it hasn’t matched my experience.

Helping students understand how to manage both platforms has been fairly simple. What it comes down to is maintaining Google Classroom as the primary place for students to track learning activities. By posting any Seesaw activities on Google Classroom, students are reminded to complete it simply by checking their Google Classroom to-do list.

I’ve been on the parent side of both platforms at the same time, and it was far from overwhelming. But for any parents concerned about a perceived blizzard of communications and notices coming from multiple directions, my advice is to make their inbox their one-stop-shop.

Google Classroom and Seesaw both utilize email, so parents should feel no need or obligation to visit either platform without an emailed notification (they actually can’t visit Google Classroom, anyway).

My recommendation: centralizing teacher communication

Schools and districts who live in Google Classroom and Seesaw will want to talk about how and where teachers communicate with parents. Yes, both apps generate a fair number of automated notifications, but that’s not what I’m thinking of here.

I’m talking about particular messages, updates, or information that teachers need to share with parents. Things like class newsletters, field trip forms, or important announcements. Which app should teachers use?

There is no right or wrong answer. Both Classroom and Seesaw can be used to communicate quickly and easily with parents. In my context, our school is asking teachers to use a school app to share and access news, reporting, and class communication. Whether your school decides to communicate through Classroom, Seesaw, or a third option, the key will be consistency.

The learning business is now the change business

This year I have the challenge of helping to introduce Seesaw to teachers who have been using Google Classroom for years. As teachers, it can be frustrating to get the sense that we’re being asked to make another fundamental change to our practice every time we turn around. I completely get that.

Educators should never be asked to give up our capacity to think critically. We’re fighters, and I’d be less concerned as an administrator if I heard strong and sensible pushback to a policy versus hearing nothing at all.

But I also want to remind educators that we are in the learning business. And because it’s the twenty-first century, we are also in the change business. Our profession was turned upside down by COVID-19, but we’ve been in flux for a long time before the pandemic.

Ten years ago I used an overhead projector in my classroom and carried monstrous stacks of papers to and from school each day. A lot has changed in the years since.

Adapting to change is going to be a part of our profession from here on out, and it’s a necessary part of our growth and improvement as learning leaders. Whether it’s Seesaw, another LMS, or another fundamental change to our assessment practices, it won’t be the last change we’ll make.

Adopting a positive mindset that embraces growth will be essential. And as we model that lifestyle of learning, our students will recognize it and benefit.

Our ultimate filter

When it comes to curriculum, instruction, and assessment of learning, our decision-making should always come down to two questions.

Is this good for kids?

Is this good for learning?

When it comes to these two platforms, I believe the answers are yes and yes.